You can see where I'm heading with this, I'm sure.
I thought I'd start with a couple of 3D items, that are a lovely way to package your xmas gifts. The little Top Note box, is one my up-line Juliette taught us last year, and I used for my nephew's i-tunes gift card and a chocolate bar gift.
The backpack is a pattern I found on-line and have made several variations of them. My niece got the i-tunes gift card and chocolate bar in hers, last year. I used the Beautiful Butterflies Embosslits to decorate. The DSP is retired now.
The tall box is another one from Juliette, which I filled with chocolates for my brother 'n law. Simple but effective. The tutorials will be posted at a later date. Promise.

I'd been looking through my Stampin' Write's for a couple of pens for a project, and saw some colour combinations that I thought would work well. Here I've put together Rich Razzleberry, Night of Navy, Pear Pizzaz and Whisper White. Just because it's christmas, you don't have to be traditional. The set is Delightful Decorations, and can be used so many ways. But here's my latest interpretation.

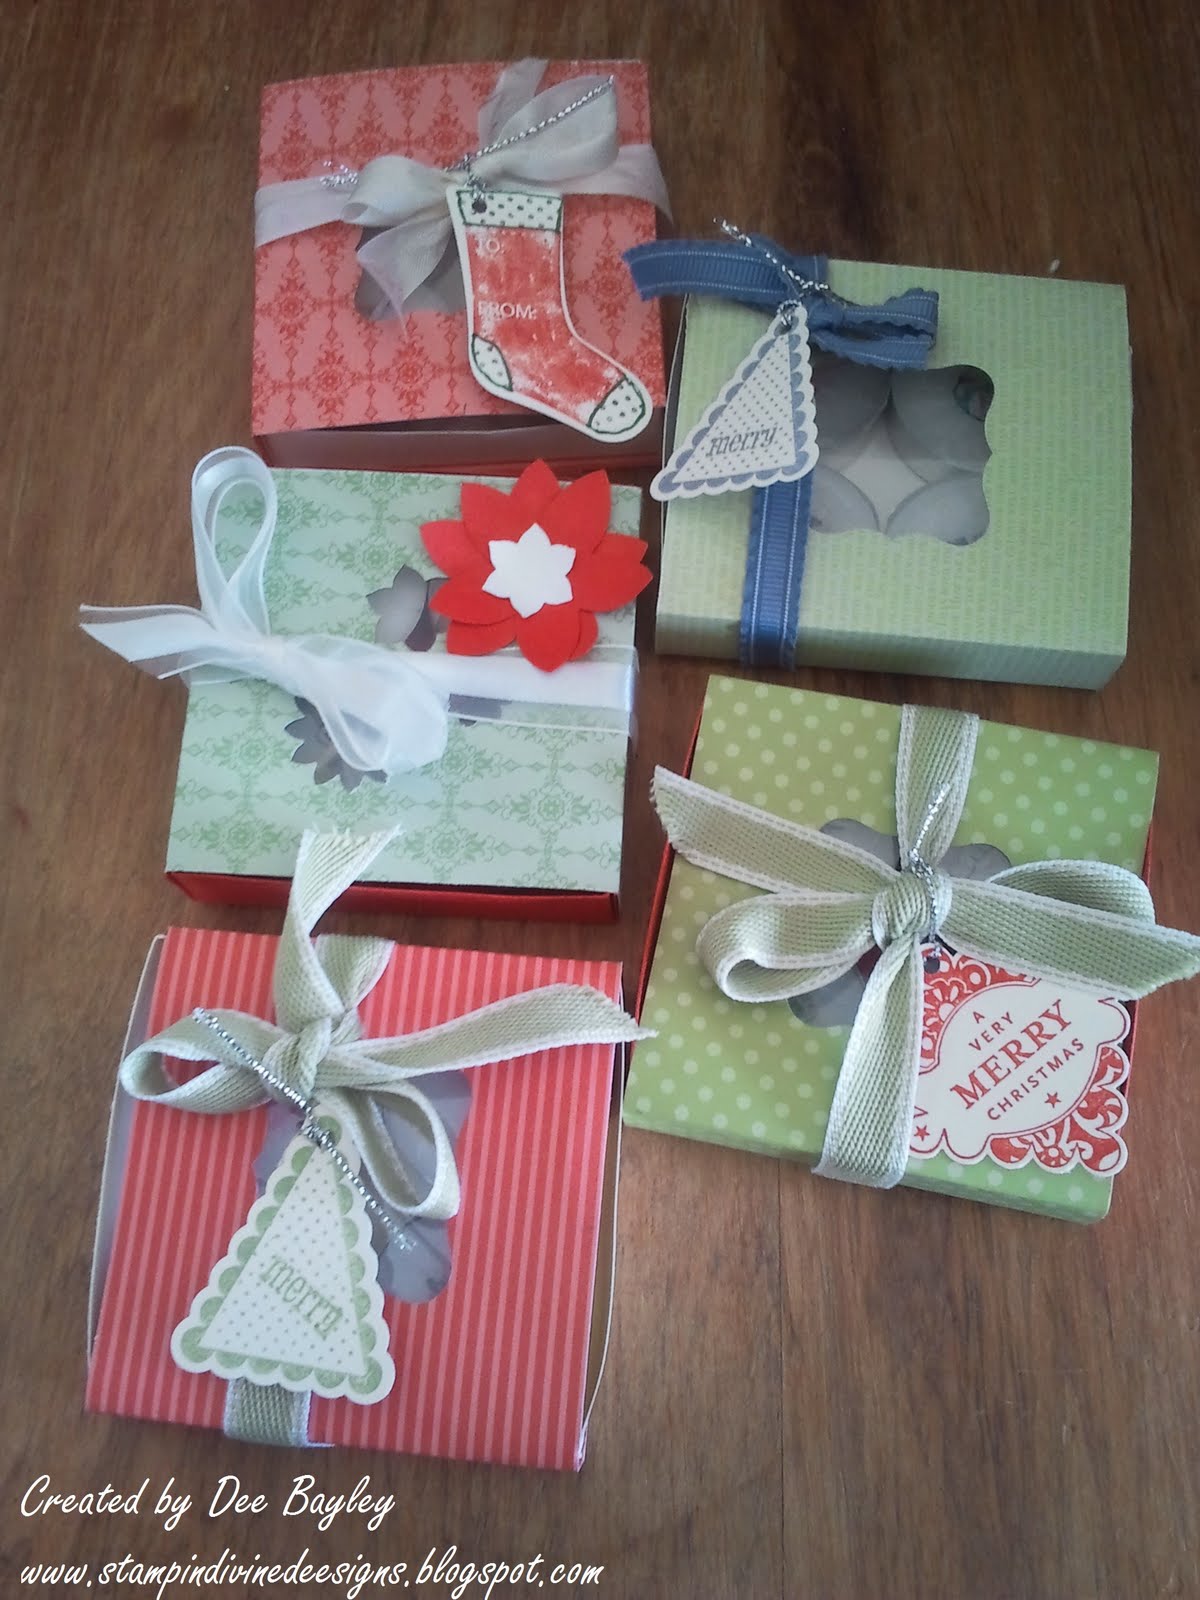
The kids and I decided to make some tea-light candles, which was an idea that I had come across on Jill Hillard's site. We used the Jolly Bingo Bits set. Tissue paper is always hard to put through a punch at the best of times, so we folded it 3 or 4 times, then placed it inside some copy paper and punched. It gives it a cleaner punch. Then stamped our images, which the kids had used the Stampin' Writes to colour the stamps as they liked. Using the Crop-a-dile we punched a hold in the middle for the wick to go through, and placed the tissue on the tea-light. Then gently heated the candle with the Heat Tool. The wax melts over the tissue, and you are left with the picture. The little box is 11.5 x 11.5 cm square. Scored at 2cm on all 4 sides. then cut at one of each of the 4 corners, to form a flap to fold and tape for corner.
The sleeve is 8cm x 23cm. Scored at 5, 7, 15, 17 cm. Wrap around the base box and tape bottom flaps to secure. On our boxes, we used the Curly Label punch to put in a window to see the candles. We used a window sheet cut to size and taped underneath of the window. Once we had put the sleeve over the box, we then tied a ribbon around it, and decorated them with a tag to suit. I think they did a great job.